Video Infographic : Let’s Make a Three-Step Process Infographic on Powerpoint
Video
Description
MORE TUTORIALS? CLICK HERE:
Some time ago, I showed you how to make a step-by-step ribbon model on PowerPoint. Following that trend, we’re going to make an easy three-step process infographic.
I think process infographics in PowerPoint are awesome. The reason is pretty straight forward: they make things easier for the audience to understand and this is primarily because the information on your PowerPoint slide is neatly packaged and categorized. Members of the audience can then process the information at their own pace, and can always refer back to another step on the slide whenever they’d like.
So what’s special about this design in particular?
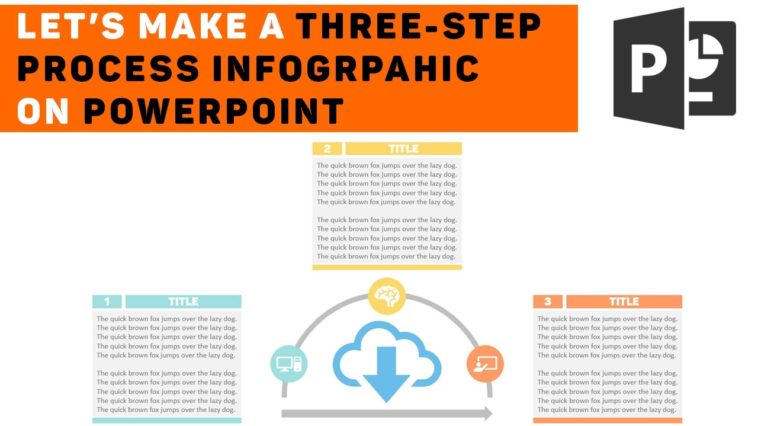
I’m glad you asked! To put it simply, the three-step process infographic we are making today focuses on a central theme.
In this video there are four icons divided into two categories:
We are going to use one base icon – this icon will set the foundation for our entire slide. It is basically illustrating what our whole process is about. In the video, I put a cloud icon to highlight that the entire process is something to do with the cloud. If I put another icon in its place, like a fork and spoon, then the person reading our slide would go “Oh, this process has something to do with food!”
We are going to use three process icons – these icons are specific to the step. Basically, each icon illustrates what the step will discuss.
On your PowerPoint slide, the two categories work with each other to tell a good story and set a pace to it.
Oh cool! Anything else?
It’s completely adaptable! There are some large areas of unused space on our PowerPoint slide for a reason. We can stretch out the text boxes depending on the size of our text for any one of our steps and take advantage of the unused spaces when needed. It’s great!
Really? What else?
It’s really (really) easy to make.
Awesome. So what are we learning in today’s video?
In today’s video, you’re going to:
1. Make your own (easy-peasy) three-step process on PowerPoint.
2. Learn how to sequence your elements on PowerPoint.
3. Learn how to take advantage of sizing, whitespace, and coloring to make a clearer, and concise, message on PowerPoint.
4. Get an overall idea of creating variations for your infographic.
And much, much more!
As always, we’re open to feedback! Have fun with this one!